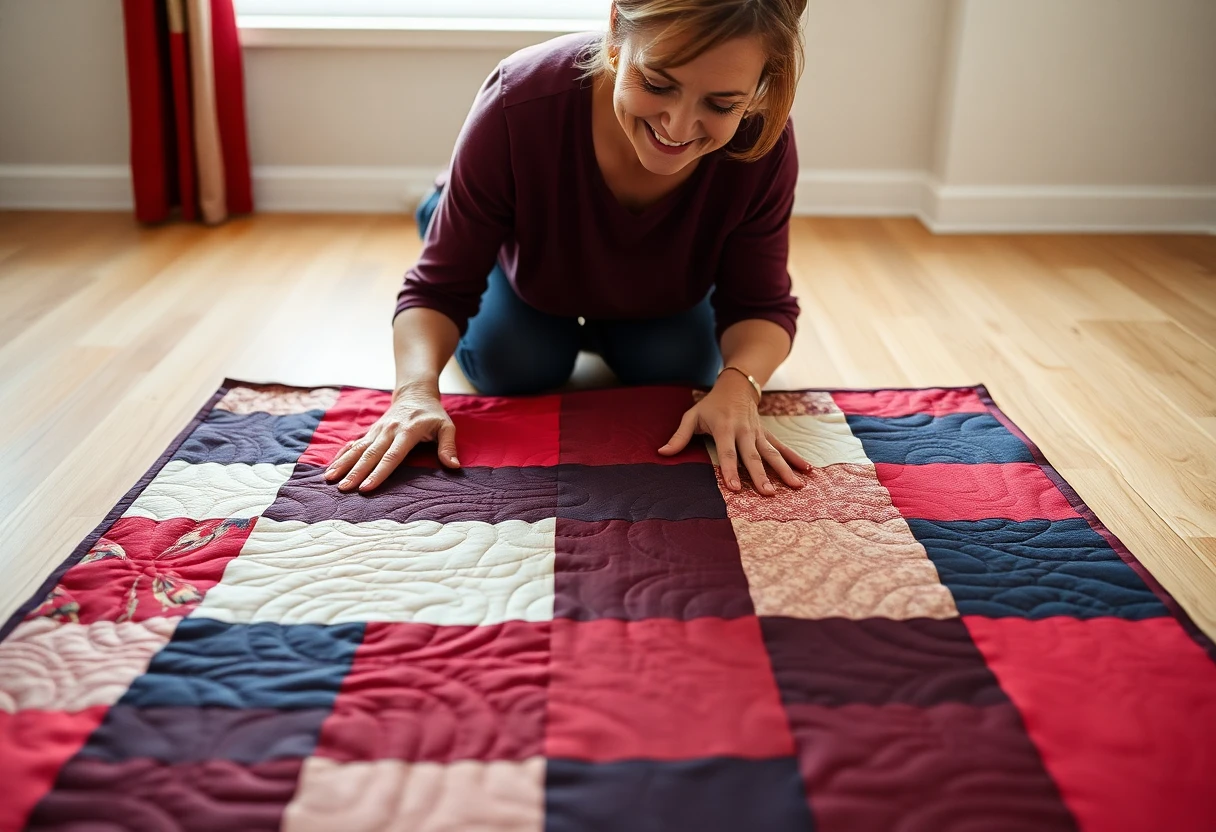
Tools
For blocks, a square ruler at least as big as the block. The Omnigrip 15 × 15-inch square ruler handles blocks up to 15 inches and doubles as the corner square for trimming a whole quilt. For long edges, a 6 × 24-inch ruler such as the Omnigrip 6 × 24, plus a rotary cutter and mat. A fresh blade matters when you're cutting through three layers of a quilt.
Squaring up blocks
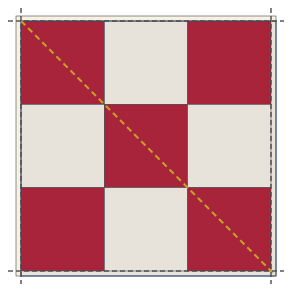
Patterns give the unfinished size of each block, which is the finished size plus ½ inch (a ¼-inch seam allowance on each side). A 12-inch block should measure 12½ inches. Blocks made with oversized units, like half-square triangles cut a bit big, are meant to be trimmed; the half-square triangle guide covers trimming those units.
- Press the block well first. Trimming an unpressed block bakes in any folds at the seams.
- Find the block's center. For a 12½-inch block, it's at 6¼ inches on the ruler. Lay the ruler so the 6¼-inch lines cross at the block's center seam or center point.
- Line up the ruler's 45-degree line with the block's diagonal (in a nine-patch, through the corners of the center square). Check that the block's seams run parallel to the ruler's grid lines.
- Trim the right side and the top, along the ruler's edges.
- Turn the block 180 degrees. Line up the freshly cut edges with the ruler's 12½-inch lines, check the diagonal again, and trim the other two sides.
Trim only the excess. If a block is short of the target in any direction, don't trim it to a smaller size alone. Either trim every block to the smallest size (and adjust the sashing or borders to match) or remake the short one. A block that's square but ¼ inch small will still throw the row off.
When trimming, protect the points. A star or triangle point should sit ¼ inch in from the trimmed edge so it isn't cut off in the seam. Look before you cut.
Squaring up the quilt before binding
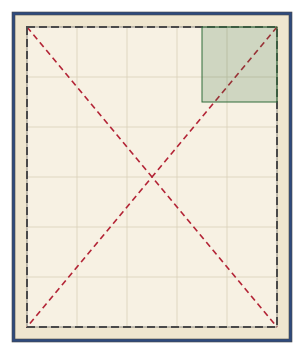
Quilting pulls a quilt in unevenly, and the batting and backing stick out several inches past the top. Trimming makes a straight edge for the binding to follow. The binding guide calls this step out for a reason: a crooked edge turns into a wavy binding.
- Lay the quilt flat on a large floor or a cutting table. If it hangs off the table, support the weight on a chair or second table so it isn't dragging.
- Measure the two diagonals, corner to corner, through the quilt top (not the batting). They should be equal. For a 50 × 60 inch quilt, each diagonal is about 78⅛ inches; for 56 × 68, about 88⅛. If they differ by more than about ½ inch, the quilt is skewed; block it first (below) before trimming, or you'll cut off more than you need.
- Measure the length and width through the center as well. Note the numbers: they're the size you're squaring to.
- At one corner, lay the square ruler so its edges sit on the quilt top's edges, with no more than a sliver of the top trimmed off. A straight seam in the border (like the border's inner seam) should run parallel to the ruler's lines. Trim along both edges of the ruler with the rotary cutter.
- Lay the long ruler along the edge from that corner and trim, sliding the ruler along a ruler's length at a time and overlapping the last cut by several inches. Line up a line on the ruler with a border seam or a row of blocks so the cut stays parallel to them, not to the uneven edge.
- Square each remaining corner and side the same way. Check the diagonals once more when you've gone all the way around.
Most quilters trim the batting and backing even with the quilt top, which is how the site's binding guide is written. If you like a binding that feels full, you can leave about ⅛ inch of batting showing past the top and widen the binding's seam to match, as long as you do it consistently all the way around.
For the border, use the border's seam as the reference, not the outside edge: the inner border seam of a 4-inch border should be 4¼ inches from the trim line on every side (4 inches of border plus the ¼-inch seam the binding will take).
Fixing wavy borders
Wavy borders come from borders cut to the stretched edge measurement, borders sewn on without easing, or a quilt that's densely quilted in the middle and lightly quilted at the edges, so the center draws in and the border doesn't. The fix depends on when you notice.
Before quilting
Take the border off and put it back on correctly. Measure through the center, cut the border to that length, and pin it on at the center and quarter marks, easing the quilt to fit. You don't always have to remove a whole border: undo the wavy stretch only, re-measure, and reattach. The borders guide has the full method.
After quilting
A mild wave can often be quilted out. Quilting the border about as densely as the center pulls it in to match, which is the main reason to plan border quilting rather than leaving the border plain.
For more than a mild wave, block the quilt:
- Wet the quilt thoroughly, by soaking it or running it through a rinse and spin cycle (check that the fabrics are colorfast first; a red that bleeds onto white is far harder to fix than a wavy border).
- Lay it flat on a surface you can pin into, such as carpet covered with a clean sheet or interlocking foam floor tiles.
- Use your center measurements as the target. Smooth the quilt out, push the extra fullness of the wavy edge in toward the center, and pin the edges straight every few inches with T-pins, checking with long rulers that the sides are straight and the corners are square.
- Let it dry completely before unpinning; that can take one to two days. A fan speeds it up.
- Trim and square the dry quilt as above.
A steam iron held just above the fabric, without pressing, can shrink a slightly full area of cotton border. Test on the border first, especially if the batting is polyester, which can melt.
Common mistakes and fixes
| Problem | Cause | Fix |
|---|---|---|
| Blocks different sizes | Seam width varied, or blocks not trimmed | Trim all blocks to the same size; check the seam test |
| Points cut off when trimming | Ruler placed by the edge, not the block center | Place by the center and diagonal; leave ¼ inch beyond every point |
| Diagonals unequal on the quilted quilt | Quilt skewed during basting or quilting | Block it to the center measurements, then trim |
| Trim line wanders on a long side | Ruler lined up with the ragged edge | Line the ruler up with a seam or row instead |
| Binding ripples after trimming | Edge trimmed crooked or borders still wavy | Re-square, or block the quilt before binding |
Next comes binding, then a label. For blocks joined after quilting, see quilt as you go, where every block is squared to the same size before joining. The whole process from fabric to finished quilt is in how to make a quilt.
Products on this page
Photos and prices come from Amazon and can change.
 Omnigrip Quilter's Square Ruler 15 x 15Check price on Amazon
- Omnigrip Rectangle Quilting Ruler 6 x 24Check price on Amazon
You might also like
 Quilt as you go: joining quilted blocks with stripsQuilting each block on its own, then joining them with narrow front and back strips, with exact cut sizes.
 How to bind a quiltDouble-fold binding from cutting strips to mitered corners and an invisible join.
 How to make a quilt from a fabric panelSquaring a pre-printed panel that's off-grain, border math for two common panel sizes, and quilting around the printed picture.
 How to add borders to a quiltMeasuring through the center, butted and mitered corners, and border strip math with a worked example.